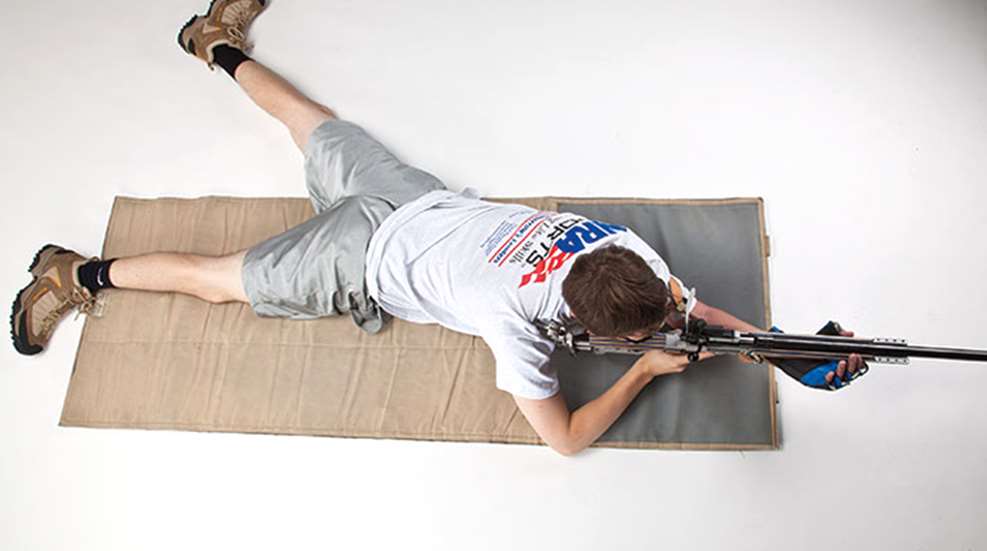
The prone position is nearly as steady as the benchrest shooting position. The prone position is stable because more of the body is in contact with the ground than with the standing, sitting or kneeling positions. In this article we will cover the cocked-leg and straight-leg prone positions and how to assume the prone position. Each position has its strong points, and by understanding what these are, you can choose the prone position that best fits your shooting purpose or body shape.
In shooting, the rule is to always shoot from the steadiest position from which you can see the target. The prone is the preferred position. A good example would be if you were hunting woodchuck in the east, or prairie dogs or antelope in the west. In these three cases, the targets are either small or a long distance away-or both-requiring the steadiest position possible so you can see the animal.
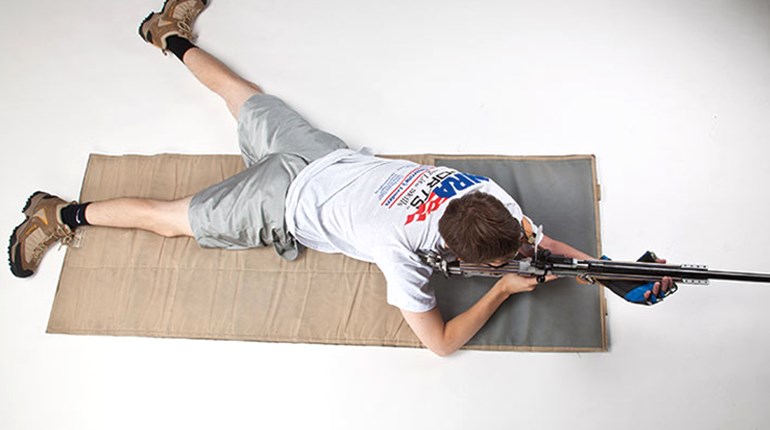
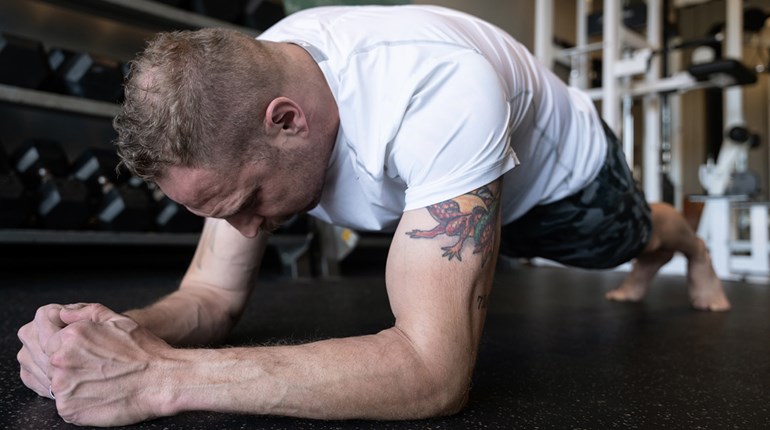
How did these positions get their names? The straight-leg prone position (pictured above) is called this because the shooter's legs are straight and flat behind them on the ground. One of the strengths of the straight-leg position is that it is quick to assume: You just lay down on your stomach with your legs straight. This position is great for the shooter that is slim; however, if you are little wide around the middle, the cocked-leg position may be better for you. In this case, the reason the cocked leg is the preferred position is that it takes the pressure off of your stomach and chest, making it easier to breathe, which in turn reduces your pulse rate. You simply bend the right leg, which rolls you slightly onto the left side of your chest, taking the pressure off of your stomach.
Remember the eight steps to learning a position covered in the benchrest and standing-position articles? To refresh your memory they are as follows: 1. Study the position, 2. Practice the position without the rifle, 3. Practice with the rifle, 4. Align the position with the target, 5. Dry-fire the rifle at the target, 6. Shoot groups at the target with live fire, 7. Adjust sight to center shot group on target, and 8. Continue to shoot groups from the position. We will cover steps 1 through 4 for all three positions in this article. The other four steps remain the same and all eight steps are used in the original order.
Step 1. Studying right-handed shooter in the cocked-leg position:
- Feet are on the ground with the legs relaxed.
- The right leg is pulled up, bending at the knee.
- The left leg is parallel to the spine
- Butt of the rifle in the shoulder close to neck.
- Left elbow on the ground just to left of the rifle's forearm.
- The left hand is on the sandbag supporting the rifle under the forearm. Optional hand position is under the rifle butt.
- Right elbow is on the ground.
- The shoulders are level.
- Right hand is firmly on the rifle's pistol grip to support the trigger finger and pulls the rifle firmly into the shoulder.
- Face rests firmly against the stock with eye looking straight down the sights.
- The position is aligned to the center to the target.
The only real differences between the straight-leg and cocked-leg prone position is that in the straight-leg prone position, your legs are straight and flat behind you on the ground with your stomach also flat on the ground.
Step 2. Practice the position without the rifle:
Without the rifle you don't have to worry about the rifle's muzzle direction yet, which allows you to focus on developing the position. Assume the position without the rifle following the bullet points listed above until you feel you have the position down.
Step 3. Practice with the rifle:
Now assume the position with the rifle and watch where you point the muzzle of the rifle. Again, follow the bullet points listed.
Step 4. Aligning the prone position to the target:
- For horizontal adjustments, move your whole body left or right using the sandbag as your pivot point to center the rifle on the target.
- For vertical adjustments, raise or lower the height of the sandbag to center the rifle on the target.
Now that we have covered the first four steps of learning the prone position, you may be wondering how you safely assume the prone. The steps are as follows:
- Keeping your rifle pointed downrange, approach the firing line, then step back about the distance of your height.
- Keeping the rifle pointed downrange, kneel down on both knees.
- Keeping the rifle pointed downrange with your left hand, lean forward, extending your right hand forward towards the firing line.
- Keeping the rifle pointed downrange, lower yourself onto the ground with your right arm and hand.
- Position your left hand on the support.
Practice keeping the rifle pointed in a safe direction when assuming and getting out of the position until you are comfortable with it. Keeping the muzzle always pointed in a safe direction is the first rule of safe gun handling and range etiquette.
This is a quick introduction to the prone positions and you will see it used for hunting, or competitive shooting with the addition of a sling. For more details on these positions you may want to contact an NRA Rifle Coach. To find a coach near you, contact NRA Coach Program at [email protected] or attend an NRA rifle competition.

