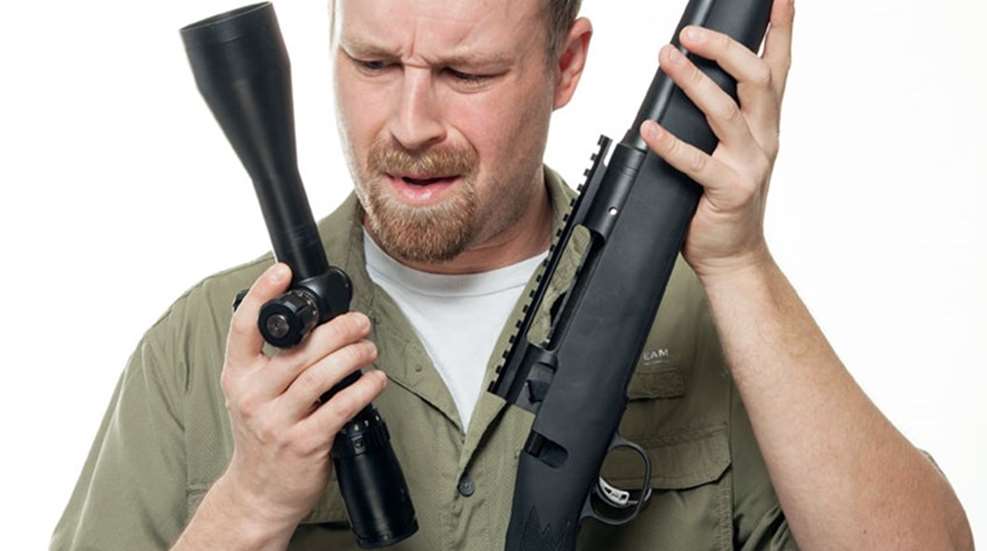
A good firearm needs a good optic to connect the shooter to the gun. But more importantly, that optic needs to be mounted to the gun tightly and precisely. Otherwise, your hard-earned investment won’t perform as expected. Assuming you have all the proper tools, mounting a scope isn’t difficult.
Step 1: Mount the Bases
Most firearms that are optic-ready have been what’s called “drilled and tapped” from the manufacturer. This simply means that the receiver of the firearm has the proper holes placed in the proper positions for that rifle, shotgun or handgun. Once you’ve unscrewed the “plug” screws out of their respective holes as shipped from the factory, you can mount your bases. Bases and their shape, size, materials, design and color can vary, but the key factor is that your bases are made to fit the model of firearm you intend to mount an optic on. Once you’ve got your bases selected and the factory screws removed from the holes, screw your bases onto the receiver with the supplied hardware, making sure the bases are in the correct position and face the proper direction. Different companies suggest slightly different pounds of torque to be applied to the screws (some may say in the instructions how much force should be applied), but anywhere from 35-40 pounds of force from a torque wrench is plenty, and it’s always worked for me.
Tip: If these bases are going on a firearm that won’t be having bases swapped out regularly, make sure you prevent moisture from rusting the metal under the bases by applying grease or thick oil under the bases on top of the receiver before mounting the bases.
Step 2: Mounting the Rings
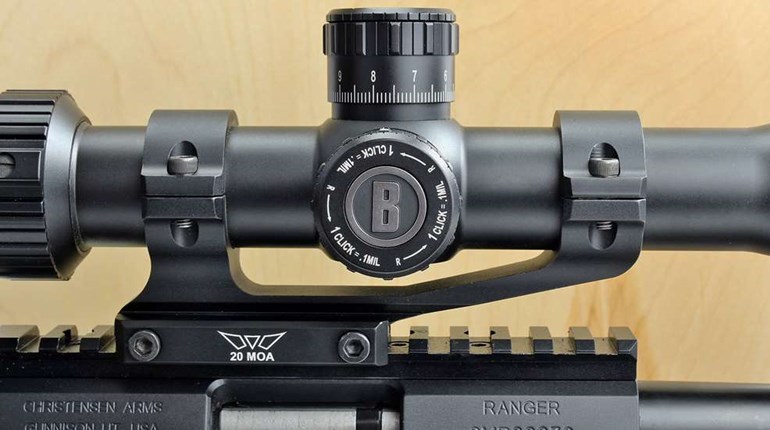
Once your bases are securely locked down, the next step is to install the scope rings. Scope rings come in several heights, colors, designs (I prefer horizontally split rings over vertically split rings. The reason will become clear later.), and materials, but the important consideration that should be made here is ring height, as that determines what height the scope will sit above the receiver—which also means it determines how the scope aligns with your line of sight through the optic. The rings will mount differently based on the base system, and need to be matched not only to the height needed for proper eye-to-optic alignment, but also for scope tube diameter.
Tip: To check for best ring height, set the rings in place, and then close your eyes while comfortably shouldering or holding the firearm while looking down a pair of imaginary sights. Now open your eyes. Are you looking at the bottom of the rings or the bases? That means you need lower rings. Are you looking over the top of the rings? Get higher rings to line up the scope with your comfortable shooting position.
Step 3: Leveling the Firearm
After getting the rings and bases mounted on the rifle, the real work begins. First, place the firearm in a proper gun vise. Next, with the scope leveling kit, place one level on a flat point on the rear of the receiver and the barrel level at the farthest point away from the barrel. Using the rear receiver level, adjust the rifle so it sits level in the gun vise or rest. Now match the barrel level with the rear receiver level, and tighten the barrel level down, making sure it stays in sync with the rear receiver level. Once both levels are level, you can remove the rear level and move on to the next step.
Step 4: Leveling the Scope
Because we know that the firearm is level now due to the redundancy we just performed when leveling the firearm, we can ensure that the optic will be perfectly lined up with the bore. With the proper bit, unscrew the ring screws, removing the top or side of the ring (this can change based on ring model), and insert the optic into the rings. Return the ring halves into their proper places. Start the screws back into the rings, but allow enough slack to adjust the scope back to the level position if the firearm or scope gets bumped in the process. Place the level that was on the rear receiver on top of the scope’s elevation turret perpendicular to the barrel. Using the barrel level, make sure the firearm is level before tightening down screws. Rotate the optic in the rings until the scope level matches the barrel level. Once the level on the scope and the barrel level are matched and leveled, the screws can be tightened back down.
Step 5: Locking Down the Optic
Once the optic has been leveled and the screws have been started, begin tightening the screws much like you would a tire (work diagonally across the scope), using the torque wrench using the same 35-40 pounds of torque. Once all screws are tightened down equally, you’re ready to go shoot.
Tip: While working diagonally across the scope should ensure equal pressure and tension, which should keep the scope level, sometimes the downwards pressure from the screws makes the rings grip the scope, and the optic begins to rotate. Pay attention to the level on the scope throughout the process, and if you notice a shift, tighten the screws on the side the scope level’s bubble is rising on. This will bring those rings back down, and should straighten up the scope, making the crosshairs align perfectly with the bore by the end. This is much easier to do with horizontally split rings. In fact, I’ve never worked with vertically split rings for this reason.
Step 6: Clean Up
Now that the scope is level and all screws are tightened down, you can put the levels away, and proceed to boresight or go to the range if you prefer to shoot your gun to get it on paper.