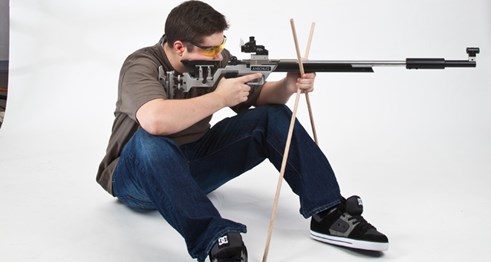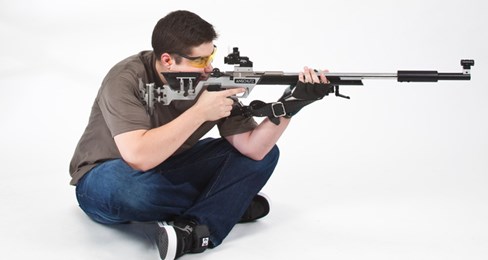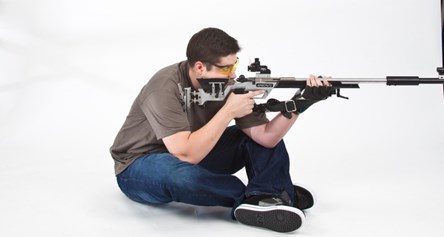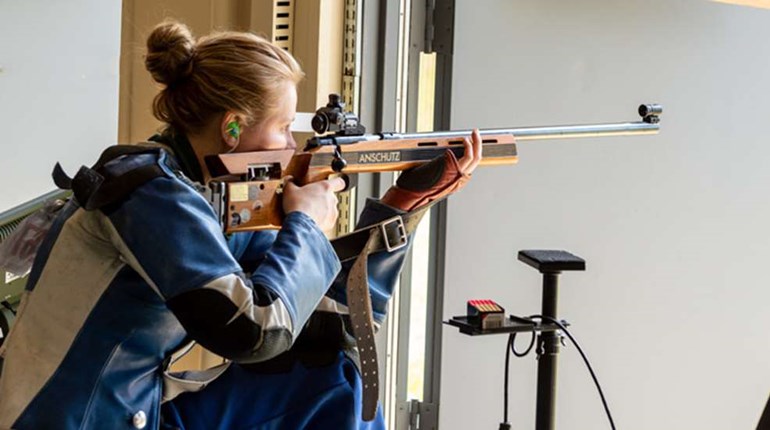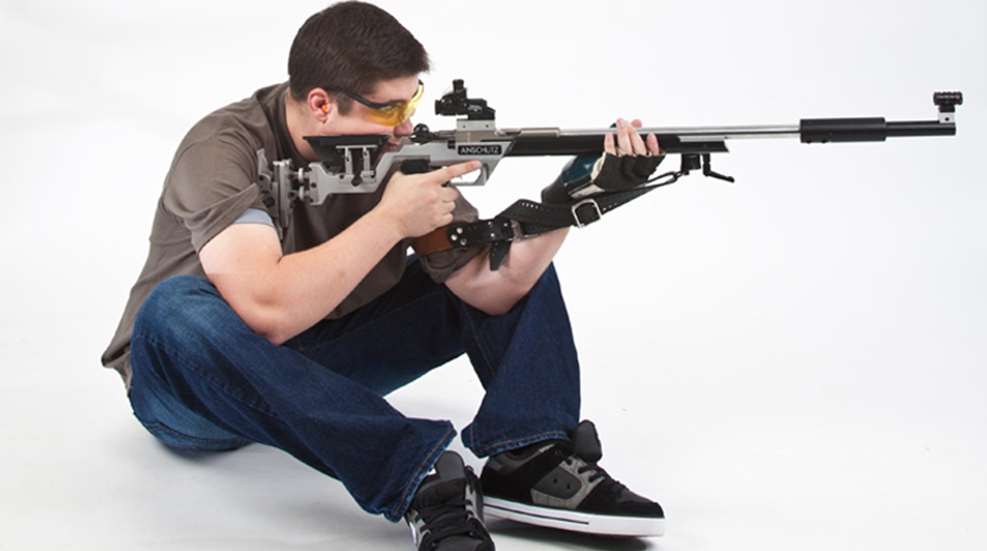
The sitting position offers advantages and drawbacks. It's almost as stable as the prone position, but it gives you better observation of the field. However, it takes longer to assume than the kneeling and standing positions. There are four sitting positions, and once you understand each position's strong points, you can choose the one that best fits your needs and body flexibility. Each gets its name from the position of the shooter's legs.
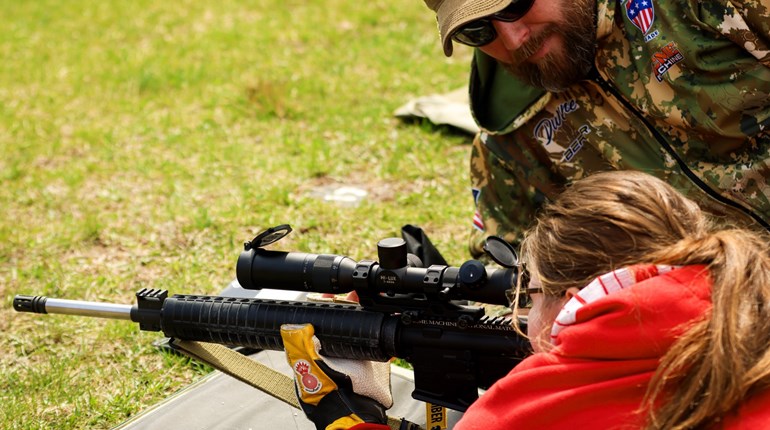
Open Leg Sitting Position (pictured above)
The simplest to assume is the open leg sitting position: You just sit down on the ground with your legs out in front of you, and support the rifle with your muscles and support from the sling. However, without the aid of bone-to-bone support or external support, your body soon fatigues and your shot groups open up.
How to do it (using a hasty sling):
1. The outside edge of the feet contact on the ground.
2. Elbows are placed in front of both knees (if you have the flexibility) or on the inside the knees (if you don't).
3. The muscles of the legs pull together to support the elbows.
4. Left hand under the gun's forearm, with the sling across the back of the hand.
5. The sling goes across the chest and behind the left arm as high as possible to take advantage of the angle to increase support of the rifle.
6. The buttstock goes in the right shoulder close to the neck.
7. The shoulders are level.
8. The right hand is firmly on the rifle's pistol grip to support the trigger finger and pulls the rifle firmly into the shoulder.
9. The face is placed firmly against the stock with your dominant eye looking straight through the sights. The face must be in the exact same position on the stock to produce small shot groups.
Crossed Stick Shooting Position (Pictured above)
This position is steadier for most people whether you are thick or thin around the middle. Basically, you're taking the open leg position and putting your rifle or pistol over the crossed stick-it takes the question of muscle fatigue out of the equation.
How to do it:
1. Feet flat on the ground or outside edge of the feet contacting on the ground.
2. Both legs are relaxed.
3. The rifle forearm rests on the crossed stick and is steadied by the left hand.
4. The sling is high on the left arm where the bicep goes into the shoulder. The high sling position is to reduce the pulse beat of the heart, which can be transferred to the rifle if the sling is positioned lower. The sling supports the weight of the rifle and should be tight enough to act like a rubber band pulling the rifle into your shoulder.
5. Position of the buttstock in the right shoulder, position of the shoulders, position of the right hand and of the face against the stock are all as in the previous position.
Cross-Legged Sitting Position (Pictured above)
In the crossed-leg position you are not facing the target as directly as other positions, so a heavy-recoiling rifle will push you out of position, so you take longer to recover back onto the target. But if you're shooting smaller calibers, this position may work well for you.
How to do it (using a competitive sling):
1. Right foot is flat on the ground, relaxed, with the foot under the knee of the left leg.
2. The left leg is crossed over the right leg with the heel of the left foot under the right knee. Both legs are pulled up close to the body. The right foot holds up the left leg, which supports the left elbow in holding the rifle up. The crossings of left over right naturally raise the muzzle of the rifle up, helping with natural point of aim (NPA). If you are one of those super flexible people, the crossed leg position may work well for you because you can relax your legs and use bone-to-bone support.
3. Left elbow is placed inside left knee.
4. Left hand under the gun's forearm, but pulled back toward the left shoulder to raise the muzzle of the rifle.
5. Buttstock of the rifle in the right shoulder close to neck.
6. The shoulders are level.
7. The right elbow is on the inside of the right knee-again to aid in absorbing recoil.
8. The right hand is firmly on the rifle's pistol grip to support the trigger finger and pulls the rifle firmly into the shoulder.
9. Face firmly against the stock with eye looking straight down the sights.
Crossed Ankle Position (Pictured above)
The crossed ankle position is great for helping to absorb recoil because you face the target straighter than in the cross-legged position. This puts more of your body weight behind the rifle. If you are flexible, you can bend forward, which lowers your center of gravity and further absorbs recoil!
How to do it:
1. Right foot on the ground and foot and leg are relaxed.
2. The left leg is crossed over the right foot or leg and the leg is relaxed. The right foot or leg hold up the left leg, which supports the left elbow in holding the rifle up. The crossings of left-over-right naturally raise the muzzle of the rifle up, helping with natural point of aim (NPA). Some people are so flexible that their legs just lay flat on the ground. If that is you, you will need to use your leg muscles to hold the legs up, so the rifle will be pointed at the target.
3. Left elbow in front of the knee to help absorb recoil.
4. Left hand under the forearm with the sling across the back of the hand. If the rifle is equipped with adjustable hand stop/sling swivel, move it to location to give you correct NPA. If your rifle has a fixed sling point, move your hand in or out on the forearm for vertical adjustment to you NPA.
5. Buttstock of the rifle in the right shoulder close to neck.
6. The shoulders are level.
7. The right elbow is on the inside to the right knee again to aid in absorbing recoil.
8. The right hand is firmly on the rifle's pistol grip to support the trigger finger and pulls the rifle firmly into the shoulder.
9. Face firmly against the stock with eye looking straight down the sights.

