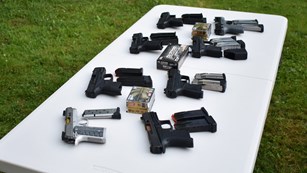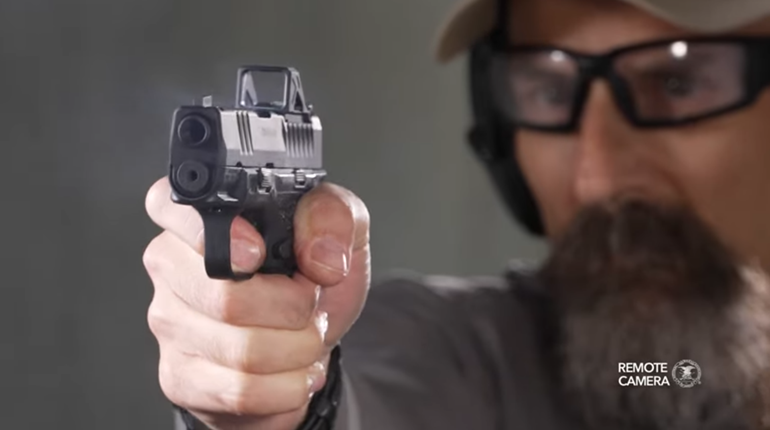
Recently, a coworker brought a Muddy Girl Ruger LC9s to my office. Instead of admiring a practical, concealable and infinitely cute pistol I was witnessing a complete disaster. A disaster which could have been avoided.
This is what I imagine happened: The owner removed the takedown pin, pushed out the two frame insert pins and pulled the frame insert (or chassis) out of the frame. Suddenly springs flew everywhere and the cleaning experience (which is fabled to encourage bonding with your sidearm), turned into a game of “find the springs on the carpet,” otherwise referred to as the “Armorer’s Prayer.” The owner intuitively put springs back, matching their shapes to the cutouts in the frame insert. Then, slid the slide back onto the frame and reinstalled the three pins. However, a key step was missed and the trigger spring and trigger bar were reinstalled incorrectly. When the trigger was pressed it would not actuate the sear properly. When the slide was pulled to the rear, it locked up hideously, as in the photo below. Is this sounding familiar to a few of you?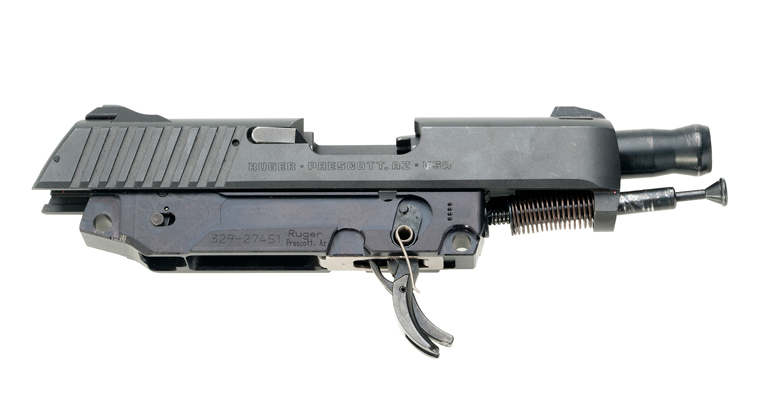
Externally the Ruger LC9s appears to be a simple firearm held together by three small pins. But underneath the attractive frame is a machine with many small parts that is designed and configured to control mini-explosions in your hand with the highest amount of comfort and pleasure for the user as possible. Here’s a life lesson: Don’t take it for granted that because it is attractive, it is also simple.
It is strongly encouraged to follow the takedown instructions exactly as the owner’s manual describes…and not one pin more.
However, my coworker was unable to resist the temptation and now I was gifted with the opportunity of repairing the pistol and of course, writing it up. With the slide locked to the rear, using a 1/16-inch punch, I was able to remove the back plate and the firing pin, which relieved pressure on the sear. I inserted an empty magazine, pressed the trigger and slid the slide off the frame. Then I reinstalled the firing pin and back plate into the slide.
I removed the empty magazine and took out the chassis. I oriented the trigger bar such that the groove is positioned down. 
I wound the trigger spring counterclockwise nearly 360 degrees, and nestled it in the groove on the underside of the trigger bar. 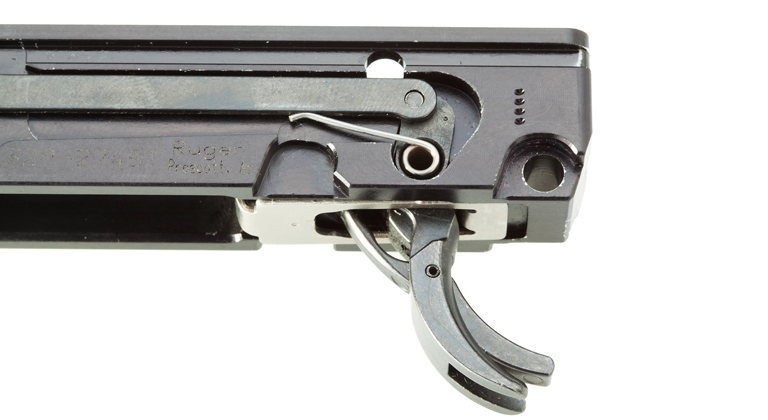
I kept my fingers pinched on the trigger bar and reinserted the chassis into the frame. With the front of the chassis slightly tilted up, I staged the takedown door into the chassis, and finished the installation. I inserted the empty magazine and pulled the trigger to observe the sear actuated properly with the trigger press.
After I was sure the trigger operated correctly, I removed the magazine. I slid the slide onto the frame, pinched it back 1/8 of an inch, and dropped in the takedown pin. I reinstalled both frame insert pins from left to right (although they don’t appear to be directional), and moved the takedown plate into the “up” position.
Now that the firearm was reassembled, I wanted to verify everything operated as it should. I inserted the empty magazine and moved the safety into the up/on position and pressed the trigger; it did not dry fire. I moved the safety into the down/off position and pressed the trigger; the gun did dry fire. I racked the slide and the action locked open. Voila, Ruger LC9s is correctly assembled.
If you have removed the chassis of your Ruger LC9s, then these directions should help you get it back together. If you have gone to the trouble of taking the sear housing apart, then the only thing you can do is return the firearm and all its pieces to Ruger.
I know the internal working of a tool which brings joy and appears to be simple is intriguing. However, the message I hope to impart is that we need to resist the temptation to take the firearm down further than the manufacturer recommends. In many cases, doing so will void the warranty on the firearm. If you are lucky, the manufacturer will allow you to return the firearm for repair, but expect to pay dearly for shipping, parts and labor.
As always, please let me know if you found this article helpful and what you might like to see next.