You crossed the big hurdles, and have secured your certification to carry concealed. Now what? What more do you have to do, to increase your personal safety?
Quite a bit, as it turns out. By now, you have (hopefully) realized that taking a class to qualify for a CCW permit does not make you a shooter-these classes are, in fact, not designed for that. And you understand further that simply carrying a handgun on your person doesn't necessarily make you safer, either.
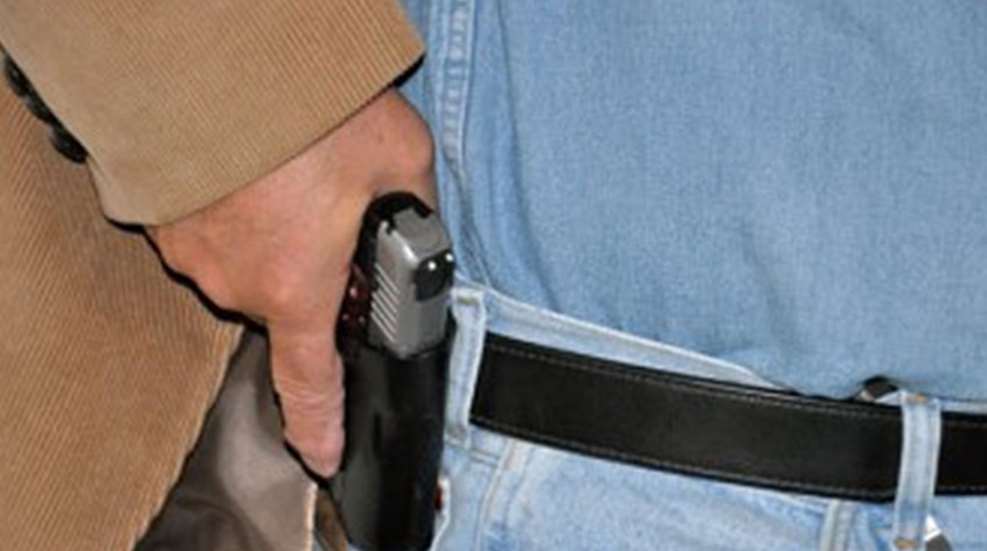
So you've engaged in some good firearms training, and have practiced your marksmanship at the range. But there's still more, for us concealed carriers, and it falls under the category of “gunhandling.” Gunhandling is, in essence, everything that you need to do to get your handgun to the point to be fired. While there are many elements within gunhandling, one of the most essential and basic is drawing your handgun, and this becomes even more important when considering a concealed-carry position. Unfortunately, it's also a step that receives less attention than it should-often because most ranges won't allow drawing from a holster. Nonetheless, it is absolutely crucial, and a good draw can mean the difference between life...and the alternative.
The good news is that learning and perfecting your concealed-carry draw is something that can be done away from the range. And in my opinion, it should be, especially in its early stages. I always start learning-and most certainly developing-a new draw without any live fire. I've found that one's full attention must be devoted to the process of a reliably safe and consistent draw.
The following tips are offered presuming you've already learned a safe, step-by-step, non-concealed holster draw in your firearms training. Most training involves your handgun carried on your strong-side, usually in an open-carry type holster, and learning a proper draw from this position is the first step to any body-carry firearm usage. This proper draw should emphasize safe gunhandling (see the Four Safety Rules, and among several important points, not allowing the muzzle to cover anything you're not willing to destroy-especially your own body parts). It should also emphasize efficiency: minimizing the time, effort and space it takes to get that firearm oriented toward your threat.
To prepare for concealed carry drawing practice:
First, adhere to the safety rules (read more here).
Second, use a “blue gun”-industry lingo for those blue (sometimes red) solid rubber/plastic molded firearms that are used for training and practice. These are completely inoperable pieces of rubber/plastic, and allow you to make “mistakes” or see where you might be creating safety issues, without compromising safety.
If you can't use a blue gun, take your carry handgun and fully unload it, checking chamber/s and magazine physically and visually. Then, do it again. And then, unload your firearm a third time. Reverification is free, it's good practice, and it minimizes your risks.
Third, though you should try to carry in one position so your body learns to default to that under any conditions, most of us can't always use the same concealment placement. If you have to carry in more than one mode, follow the next steps for each one:
Decide how (holster and any other gear, clothing, etc.) you'll carry your handgun.
1. Adapting your already-learned draw to your carry position, break it down into steps-for example, getting access to proper initial grip; clearing your holster/clothing; orienting the muzzle toward your adversary; acquiring a two-handed grip if you want to use one; and acquiring your sight picture. Work each of these steps individually to make sure that your technique and your equipment are working for you.
2. Practice putting these steps together, but in very slow-motion, no more than half-speed.
3. As you do this, identify any hitches and glitches (anything getting caught on clothing, holsters malfunctions, etc.), and pay particular attention to anything that invites safety violations. In particular, be mindful of keeping your trigger finger straight along the frame until your sights are on your target, and beware of allowing the muzzle to sweep any part of your own body.
4. Remember that your practice routine includes the entire drawing-reholstering process, and that you need to be as safe in holstering as you are in drawing. While coming out of the holster needs to be as efficient as possible, there is never any hurry to reholster-too many people make the mistake of “speed-holstering,” which can have disastrous results, especially under stress.
Next, follow steps 2-4 from different body attitudes-sitting, strapped into your car seatbelt, sitting at a table or desk, etc. Then, imagine adversaries coming from different directions: to your sides, and from various angles behind you.
You can add even more realism with dry fire. You'll be using your carry firearm now (not your blue gun), so first carefully verify (again, three times, minimum-both physically and visually) that your handgun is not loaded. Then, holster it safely, and go through steps 3-5 again, but add a trigger press (including proper sight picture).
If you want even more real-life to your scenario, force yourself to react and respond to a stimulus. Using an alarmed timer (your smartphone should have one that will do), set your alarm to go off at random times, from 0 to 10 seconds. When the alarm sounds, that's your cue to draw your weapon. Again, you can vary the direction from which your imaginary adversary/s are approaching you.
Lastly, if it's at all possible, take your practice live. Find a range where you can practice as much of this as you can, culminating in firing onto a target (but not ending until your safely holster your handgun-preferably after a reload).
More Tips:
Make sure your movements are big enough: You need to be able to clear the furniture, clear your clothing, etc. Don't be tentative-you won't have the time to be so in real life, and you shouldn't practice that into your technique.
Don't cheat. Be realistic in your practice. Don't undo buttons, buckles, unseat the handgun from its holster, etc. You are practicing for real life.
Your goal is to do everything you need to do with your handgun without looking at it. Blindfolded. Especially drawing it-your eyes should be focused on your threat!
Consider adding a verbal command as you draw. Talking may serve as a distraction to you, but, it can be very effective against a threat. Train yourself to issue a command (“STOP!”) that can help your situation, as you draw your weaponIf you practice doing it now, you won't have to “think” about how or what to say and distract yourself when you need to.