I was in a hurry. I just got off work, and wanted to train but needed to clean the Glock 17 first. I had fired at least 1,200 rounds since the last cleaning. It was so carbon-filthy, the muzzle was bronze-colored and the front sight was solid black. Using the Channel Cleaning Tool, I scraped off enough debris from the rails, feed ramp and extractor tooth to have iced a small cake. After a difficult cleaning session, and eager to begin training, I hastily reassembled the firearm. I proceeded to spend another week training before guilt set it in and I felt compelled to clean again. Same dirty story, except I noticed the front pin was slightly marred. What?! At that moment I realized I had installed the trigger housing pin in the front and the locking block pin in the rear. D'oh!
How do you spare yourself from repeating this deceptively simple mistake?
The first lesson is, don’t clean your gun in a hurry. If you are going to take the time to clean and maintain your firearm, then take the time to do it correctly. No matter how simple your firearm is, resist the temptation to rush reassembly (and disassembly for that matter), as it may invite a silly (or, worst case, dangerous) mistake.
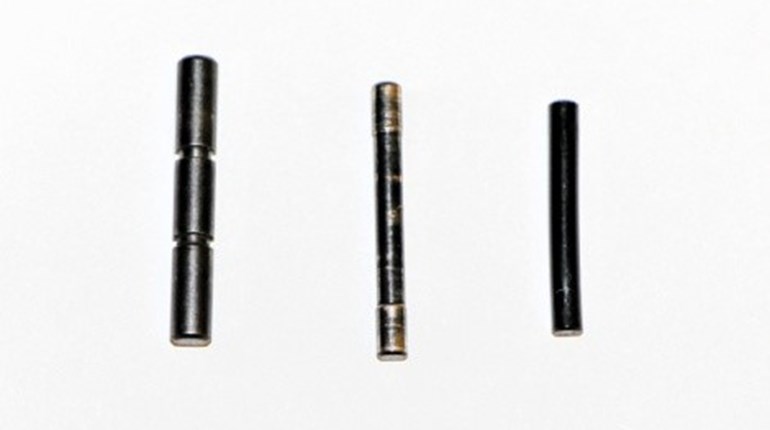
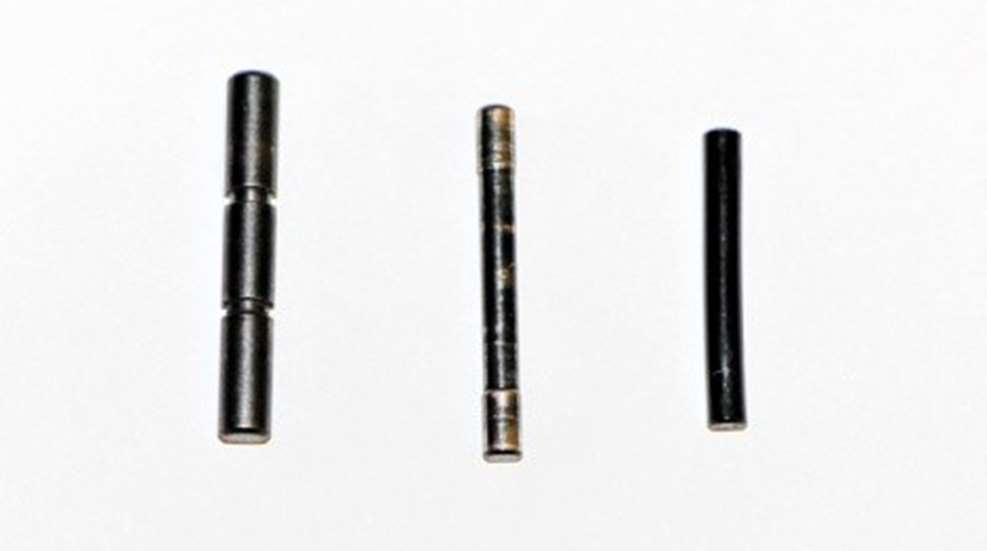
The second and most obvious lesson is the steel pin belongs in the steel locking block, the polymer pins belong in the trigger housing and trigger. See image below:
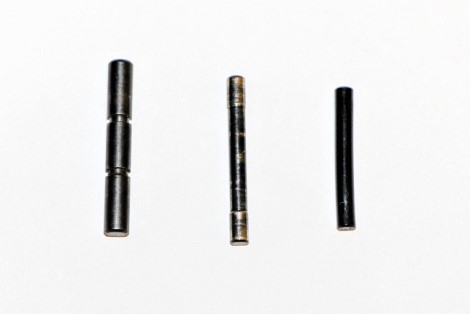
(a) The trigger pin is the fattest of the three, polymer, and has two grooves near the center. Articulate the slide stop lever gently up and down while applying pressure to the pin during disassembly and reassembly. Significant force is not required, just a little finesse with the slide stop lever.
(b) The locking block pin is thin, steel and has two grooves near the edges. It is the same diameter as the trigger housing pin but is longer. It is the first pin removed and the first pin reinstalled.
(c) The trigger housing pin is thin, polymer and completely smooth. Longer pins are necessary to accommodate backstrap attachments. This is how I made the mistake detailed above so take care to notice the smooth surface.
Note: Glock pins are removed from left to right and reinstalled from right to left.
The final lesson is to keep a modest parts kit in your range bag. This will stave off down time in training. Small parts are not expensive, but orders may take a painfully long time to process and ship.
On the bright side, despite my oversight, I never noticed a difference in performance. I sometimes wonder how long I could have run it before the pin actually broke. Have you ever made a silly mistake while reassembling your gun? Let me know in the comments below.
Most Popular